Sunday 25 April 2010

Smash it up! Part 1

Well Hello! My Tiger torturing comrades!

  Normal service looks as though it is on the horizon! Along with the North west of England's 'standard' weather pattern! So activity is blossoming up the workbench, in all earnest... Or maybe that should be 'Ernst'? Panther on the way perhaps?

 With a little spare time coming my way, I have managed to get some more 'Tiger trashing time' in! My main focus has been upon the remaining side skirts upon this 'Tamed Tiger'. ...This is not as easy as I first presumed, some real care has to be taken in order not to deform the part of the fender that is attached to the sponson.
Also I intentionally soldered the support fillets to the main skirt panel a little heavier than normal, (honest!!!) as when I tested a one the end fillet separated under the stress of the folding with the pliers.

Some of this damage does look a bit over the top on the skirts, and a lot of other modellers would probably not have gone as 'extreme'! But this is how '211' Doppelganger looked in the images I have.
 
And here is the left hand side, for your consideration!

I have also been adding some further empty stowage clamps and fastenings. Looking at images where Tigers have been stripped of their external stowage, I have noted that some of the attached fittings have quite visible weld seams holding them to the hull roof. Rooting through some tubs the Bosch light resurfaced, and now needs only a little more detailing before fitting.


Whilst attaching some more of the external fittings, I have come to a quandary with the Tetra extinguisher bracket. As the extinguisher has either been 'half inched' (liberated) or exploded during the fire, my thoughts are focused upon the retaining straps... Would they have survived?
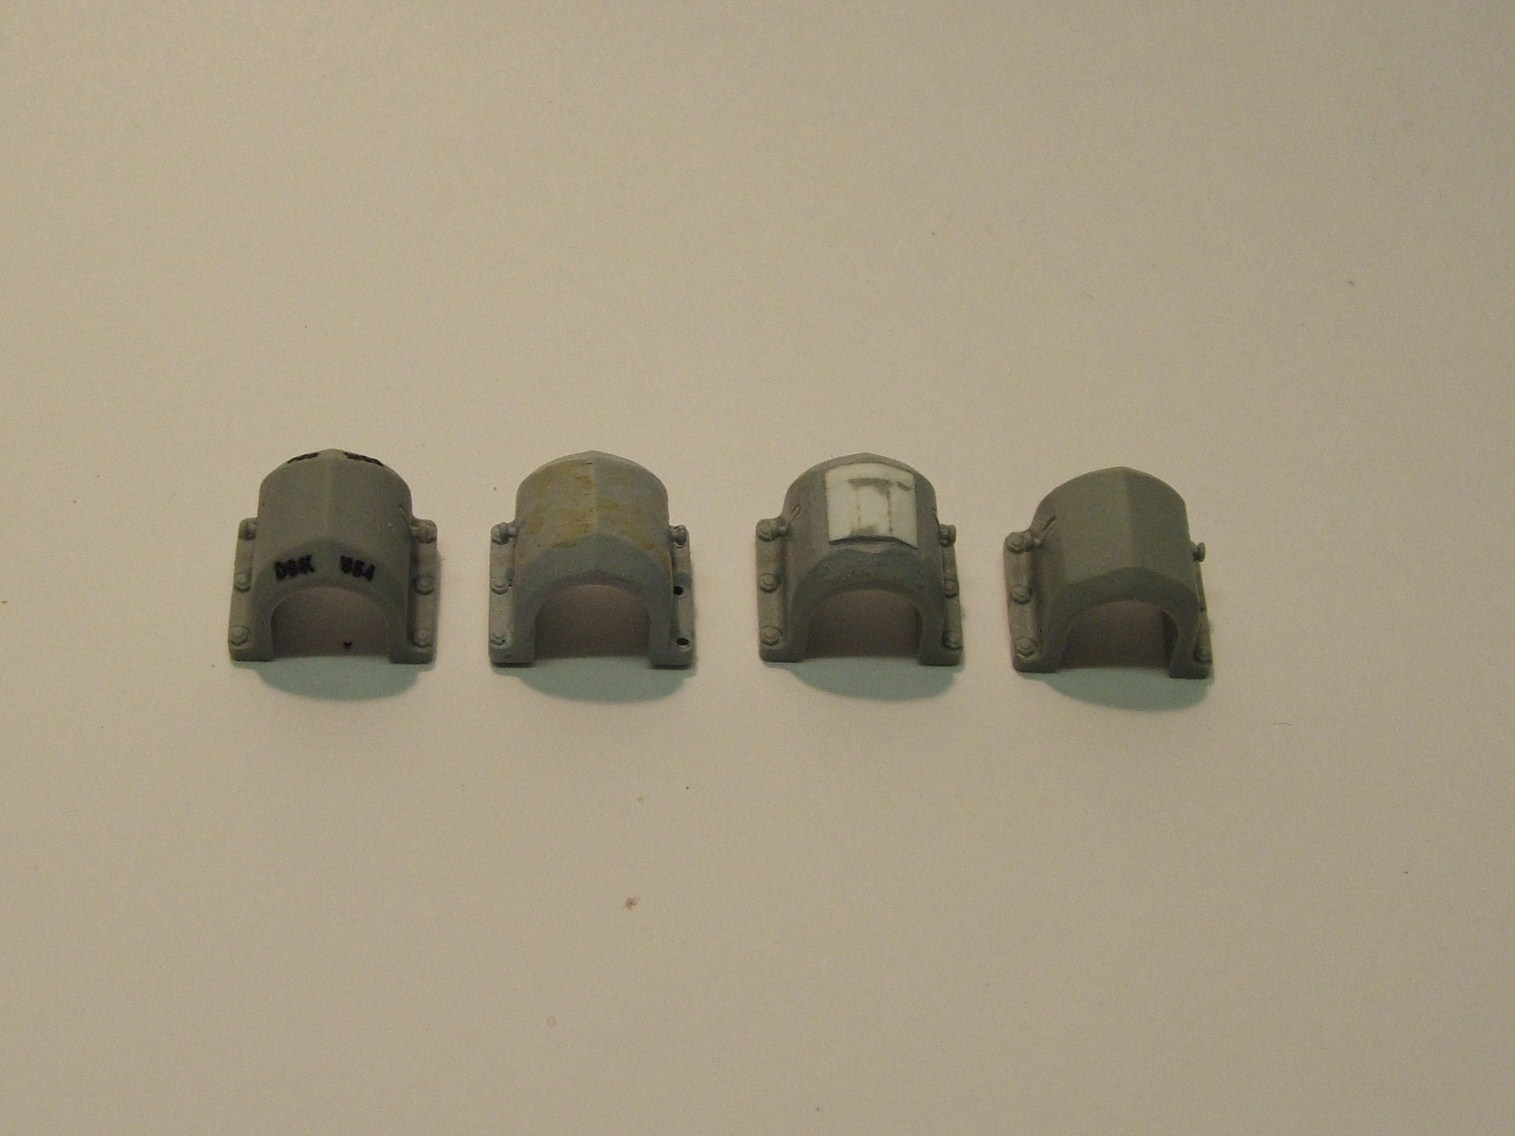
What is going to be attached to the rear of the turret of this 'dishevelled Doppelganger' you ask? ...Well Gentlefolk, it is going to be Voyagers 'Rommelkiste' or Turret Stowage Bin (on a lateral thought, do any of our German speaking readership, has a precise translation for Rommelkiste? My scant German, and trawling of the translation sites leaves me non the wiser) , this part of '211' appears to have taken a real battering, bearing the scars of small arms penetration, fire damage, and a whacking great plunging fire hole on the top behind the missing lid of the stowage bin.

Now it is starting to look like it is on the way to the painting stage in the not to distant future.


Right I have an impending appointment with a soldering Iron... Take care, I'll be back soon!


Cheers Phil.

Tuesday 20 April 2010

Getting it 'Covered'!

Good evening all! my it's great to be back.
  With a maelstrom of Chaos behind me it's back to the bench then. One thing I have got onto is the depiction of the varying production variants of the Armoured Exhaust Cover. I have mithered David Byrden over this in the past, and a lot of the features and differences come from 'mould' drop out during casting, and the moulds being 'patched' rather than reset. Often the apex of the cover suffers the most due to mould flaws, with the central ridge being flattened and smoothed. Another version has what looks like bridging plates inserted to strengthen the deteriorating mould, causing a 'roofed' effect, and yet another example has access channel machined into the side walls for the attachment nuts/bolts to be fitted or removed.

And here are the covers ready for a few layers of Mr surfacer 500... 'Claggy' grade not 'Skaggy'!!!

The casting marks are from Archer decals,with the seams on the lifting lugs applied with stretched sprue, the 'plated' cover is 1mm styrene stock sheet butted, and overlapped. The access channels on the later production variation is applied using a suitable burr and drill in a mini rotary tool. The flattened and smoothed cover is simply sanded with a fine grade wet and dry finishing paper. These will all receive a couple of coats of Mr Surfacer to blend the detail and remove the harshness of the additions.

I have had a go at beating up and deforming some of the PE 'sheet' pieces, not as easy as it appears... My hat is off to all those folks who have done this and kept them 'deformed' enough to actually attach onto the vehicle.
One little thing I discovered is that you can burn brass PE, to resemble aged and rusted mild sheet or shrapnel and projectile damage. Just 'tin' the area to be mangled and abused, slap on some liquid flux, and turn the blow torch up, then set about the PE until you get a very thin 'crumbly' area that can be poked and bent to the look you want.

See you all tomorrow, my patient friends... Cheers Phil. 

Saturday 10 April 2010

Tiger Maarsch!

Good morrow fair Tiger fans!

 I knew that I would not get away with it... The Tiger tick list of shame, that is... So here are another two. These are a lot further on than the other 'pasted' hull and turret 'dry fits', and are also the subject of a comparison web build log.
 First up the original '211' of the 2./s.SS.Pz.Abt.101. This Tiger was photographed on the 101st's approach to Morgny on the 7th June 1944, climbing up the winding hill on highway 316 leading to the town . I believe that this Tiger had the broader, heavier coating of Zimmerit on the Turret, and a one piece 40mm roof, meaning that in my view the '211' Doppelganger has no relation to the original '211' other than the re-painted tactical number. See what you think!

And here is my rendition of  Obersturmfuhrer Wessel's Tiger. I am awaiting a selection of paint systems for comparative assessment, but the painting stages should not be too far away.
 
The next Tiger has been the centre of a lot of study, and discussion over the last few years. Widely believed to be 213 of Hauptschafuhrer Hans Hoflinger, not see in the marching order of the 2./s.SS.Pz.Abt.101 on the 7th June 1944, during the road march to the Normandy alert area. But recently after following the discussions of researchers Yann Youallt, Mike Kenny, Hartmut von Holtd, to name but a few, I am more in the mind to depict it as '234' another Tiger not fully identified during the Normandy conflict. This Tiger is of great interest to me as it has a few components that mark it as being a February '44' build,meaning no armoured turret protection ring and unsculpted hull front side end plates, yet it has a 40mm roof? Maybe a turret swap at some point, or perhaps what ever components were around the assembly area at the Henschel Kassel Plant.

So there you go, two more Tigers for the ever growing list of shame... Though these two should be finished in around a month or two!

Thanks again for your interest... Cheers Phil.

Friday 9 April 2010

Tigers in the Pipeline...


A few people have been asking me recently about the 'other' Tigers that have I have been working and pondering on over the last year. Well here is the list of shame (though I am planning to get them back onto the production line very soon)

First up a 'Hybrid' Tiger '411' formally of the Schwere Kompanie Hummel, disabled 10 kilometers from Bastonge in Oberwampach. The gun sleeve has been shed from the Manlet when a winging shot that hit the muzzle brake before striking the sleeves collar.


 And here is the unlucky Tiger awaiting further building and detailing. Just not sure if a Winter or a Spring basing is the way to go?


Next up another Tiger from the s.Pz.Kmp Hummel, the infamous 'Elsdorf Tiger'! This Tiger (that I believe to be a Late Befehlspanzer variant of the Tiger Ausf E) was abandoned in the Town of Elsdorf, after knocking out a Pershing, but became firmly stuck in the debris of a house ruin. 
Some interesting features stand out upon this particular Tiger. For one it has eyelashes and a brow... Well rain guards on the Mantlets MG and Gun Sight apertures, and a Panther style Debris Guard on the forward edge of the Turret roof. Perhaps added after the recent experiences of the Panzerwaffe fighting for their very existence with the Tiger, within the debris and rubble strewn confines of towns and cities.


And here is my attempt at re-creating the scene, I might even add the M26 yet on a split plinth! Tiger 1-0 Pershing... Though the score was 1-1 a few days later!


Another 'stalled' Tiger is this very Early-Mid of the 9./s.SS.Pz.Rgt.Totenkopf. An interesting feature of this Tiger is it's vertical Zimmerit On the Turret, I have also been told that this Tiger currently resides in the Kubinka Tank Museum. And from the images I kindly received sometime ago, I have discovered that the Glacis plate also was pasted in the vertical fashion... So a revisit with the Epoxy is needed in that region.

Another addition to this Tiger Befehlspanzer is the wooden placards hung onto the turret, due to the very changeable condition of the Russian Winter/Spring of '43-44'.


I will dig some more out later... Yes there are more!!!


Thank you for taking the time to call by... Cheers Phil.

Saturday 3 April 2010

Damage Limitation!

Good day to one and all!

 Back at the workbench, (albeit for a very limited time) I have finally bit the AP round, and took a dremel to this poor Tiger! Using a mixture of cone and ball ended dental burrs, the impacts were then treated to a few applications of Tamiya Extra-Thin Cement to soften the indentations and remove any residual swarf on the craters edge. On the impact on the mantlet, I heated the ball burr and pressed it further into the wound, in order to create a little lip where the deformed plate formed a kind of solid corona. If that makes sense?
 The impacts on the Glacis were 'drilled' completely through... The hit on the drivers armour vision port, was  finished with the cone burr, slightly penetrating  through the styrene, then closed up with some Tamiya Extra-Thin. The crack in the cast port pillar was simply scratched in with a scalpel and pin.
 Now for the penetration that has deformed the Kugelblende... This being drilled completely through, and then a piece of stryrene tube with a smaller brass tube within the core, trying to replicate what I believe to be the AP round that caused the bow mg ball mount and housing to deform so alarmingly. As stated in Panzerwrecks 8 Normandy, the bow mg/radio operator must have taken a serious blow when the Tiger was hit... If the Tiger was still crewed and operational at that point!
Also a few more additions to the missing/damaged stowage fixings and clamps have been added. Along with the start of the residual attachment points, where the Tigers mudguard/fenders would have been. I have decided to also model this vehicle with a destroyed exhaust muffler on the right hand side, in order to make a start, a 4mm hole was drilled through the aperture slot on the kits rear hull. Another thing I have been thinking about including upon this build is a variation on the cast armoured exhaust covers... More about this another time.

Some more Mr Surfacer has also been applied, in order to try and depict the sub layer of Zimmerit that has been exposed by the frontal impacts and the areas not totally destroyed by the fire. this once again being flowed onto the the surface (not as heavily applied this time), then after part drying the faint impression of the Zimmerit's pattern was applied with the Lion Roar Zimmerit Applicator.

Thanks for stopping by, back real soon... Cheers Phil.